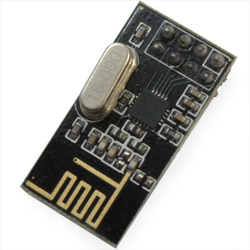
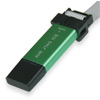
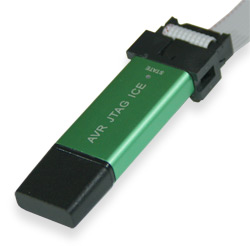
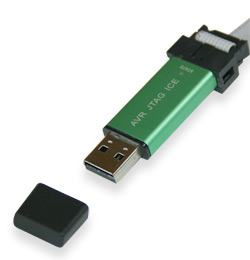
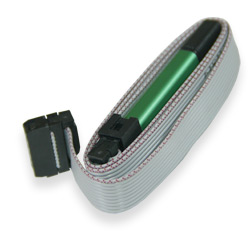
AVR JTAG is a tool for debugging devices based on the Atmel AVR family of microcontrollers. AVR JTAG is a complete analogue of AVR JTAG ICE from Atmel. For more information on how AVR Studio works with AVR JTAG, please refer to Atmel's documentation.
To work with AVR JTAG, use Atmel's "AVR Studio" software. AVR JTAG supports all microcontrollers in the JTAG family:
-
ATmega16;
ATmega162;
ATmega169;
ATmega32;
ATMega323;
ATMega64;
ATmega128.
Support for new devices is provided by updating the AVR JTAG firmware that comes with AVR Studio.
Connection
In order for AVR Studio to automatically detect the AVR JTAG, you must connect the AVR JTAG to the computer, the device being debugged, and supply power to the device being debugged before starting AVR Studio.
Connecting to a Computer
AVR JTAG connects to a standard USB port on your computer. The USB port is being converted to a COM port.
When AVR Studio starts, it automatically searches for the supported devices by accessing all COM ports of the computer in order. The search will stop as soon as a supported device is found. For example, if AVR Prog is connected to COM1 and AVR JTAG is connected to COM2, then AVR Studio will only detect AVR Prog. Therefore, when starting AVR Studio, make sure that other devices it supports are disabled, or after starting AVR Studio, manually set the port to which the AVR JTAG is connected.
If the COM port to which the AVR JTAG is connected is used by other programs (for example , terminal), then AVR Studio will not be able to detect the AVR JTAG. Exit these programs before starting AVR Studio.
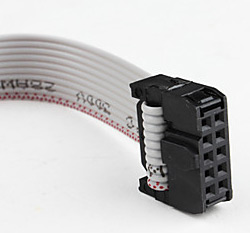
Connecting to the device being debugged
To connect to the device being debugged, 6 lines are used: TCK, TDO, TDI, TMS, VTref and GND, these lines are connected Necessary for AVR JTAG to work properly with the device being debugged.
In addition to the device being debugged, an nSRST line can be connected (used to control and monitor the microcontroller reset line). The use of this signal is not necessary for debugging, however, if the microcontroller program sets the JTD bit in the MCUCSR register, then the JTAG interface will be disabled and to enable it requires the AVR JTAG to be able to control the microcontroller reset line.
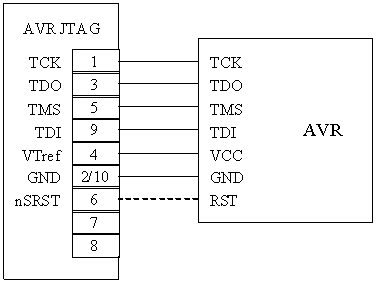
Figure 3 Connecting the AVR JTAG to the device being debugged
Connecting the power
In order for AVR Studio to detect the AVR JTAG, the power supply of the AVR JTAG and the device being debugged must be turned on before debugging (using the Start Debugging AVR Studio button ).
The following order of power-up is recommended:
-
power on the device being debugged;
-
connect the AVR JTAG ICE;
-
start AVR Studio.
Firmware update
The AVR JTAG firmware update can be done either automatically or manually.
Automatic update
Automatic update occurs when AVR Studio detects that the firmware version of AVR Studio is higher than the firmware version of AVR JTAG. In this case, AVR Studio displays a corresponding message and offers to update the firmware. If the user agrees to update the software, AVR Studio will display a dialog with instructions for updating the software. To update the software, follow these steps:
-
remove the jumper on the AVR JTAG board;
-
click the "Ok" button in the AVR Studio dialog;
-
in the AVR Prog dialog that appears press the "Program" button;
-
after the firmware is finished, close the AVR Prog window;
-
set the jumper on the AVR JTAG board;
-
power off and on the AVR JTAG.
AVR JTAG software update completed.
Manual update
Manual AVR JTAG software update may be necessary if automatic software update was interrupted for any reason ( power failure, etc.). In this case, AVR Studio will not be able to detect the AVR JTAG, find out its software version and start the automatic software update.
To perform a manual software update:
-
power off the AVR JTAG;
-
remove the jumper on the AVR JTAG board;
-
power on the AVR JTAG;
-
run the AVR Prog program;
-
select the .EBN file for programming from JTAGICE folder located in the folder where AVR Studio is installed;
-
click the "Program" button;
-
after the firmware is finished, close the AVR Prog window;
-
install jumper on the AVR JTAG board;
-
power off and on the AVR JTAG.
manual update of AVR JTAG software is complete.
This device is fully compatible with the Atmel product


 The data presented in the product description are for reference only and may differ from those indicated by the manufacturer.